Understanding the basics of Google Tag Manager
With Google Tag Manager, you can track a wide range of user interactions to better understand and improve your website’s performance.
However, if your tags aren’t set up correctly, your analytics efforts will be rendered worthless.
By the end of this tutorial, you'll have a solid understanding of how to make the most of GTM and what your business should be tracking.
Is Google Tag Manager easy to use?
Absolutely! Google Tag Manager (GTM) is built to be user-friendly, making it a great tool for marketers and website managers who aren't coding experts.
Its intuitive interface makes managing tags straightforward, and you can add HTML/JavaScript tracking to your site without writing any code.
While there is a bit of a learning curve with more complex setups – thankfully, there are plenty of tutorials and community forums to guide you and we’re here if you need help taking your GTM to the next level.
Learn more about the benefits of Google Tag Manager for your business.


What should I track with Google Tag Manager?
What you need to track the most will largely hinge on the type of business you have. For example, an e-commerce site might focus on tracking product views and purchases, while a publishing website would prioritise tags that measure engagement, like scroll depth.
Regardless of your industry, here are some key actions you should consider tracking:
- Page Views: Essential for basic analytics.
- Clicks: See what links, buttons, or images get the most attention.
- Form Submissions: Monitor when users submit forms, particularly useful for conversion tracking.
- Video Engagement: Track how users interact with video content, like plays, pauses, or completions.
- Scroll Depth: Measure how far users scroll on your pages to gauge content engagement.
- E-commerce Activities: Track product views, additions to cart, and purchases to analyse e-commerce performance. This should be a must, in our opinion, as you want to track your money to the cent.
Remember: always test your tags in the Preview section to make sure they’re firing correctly before you go live! We also strongly recommend checking what your GA4 is tracking to avoid doubling up tags.
Learn more about how GA4 and GTM work together.
How to create a variable in Google Tag Manager
Now that you know what you need to track, let’s move on to setting up a variable in Google Tag Manager.
A variable isn’t a tag itself, but it plays a crucial role in storing information that your tags and triggers use to function correctly. Here's how to create one in 5 easy steps:
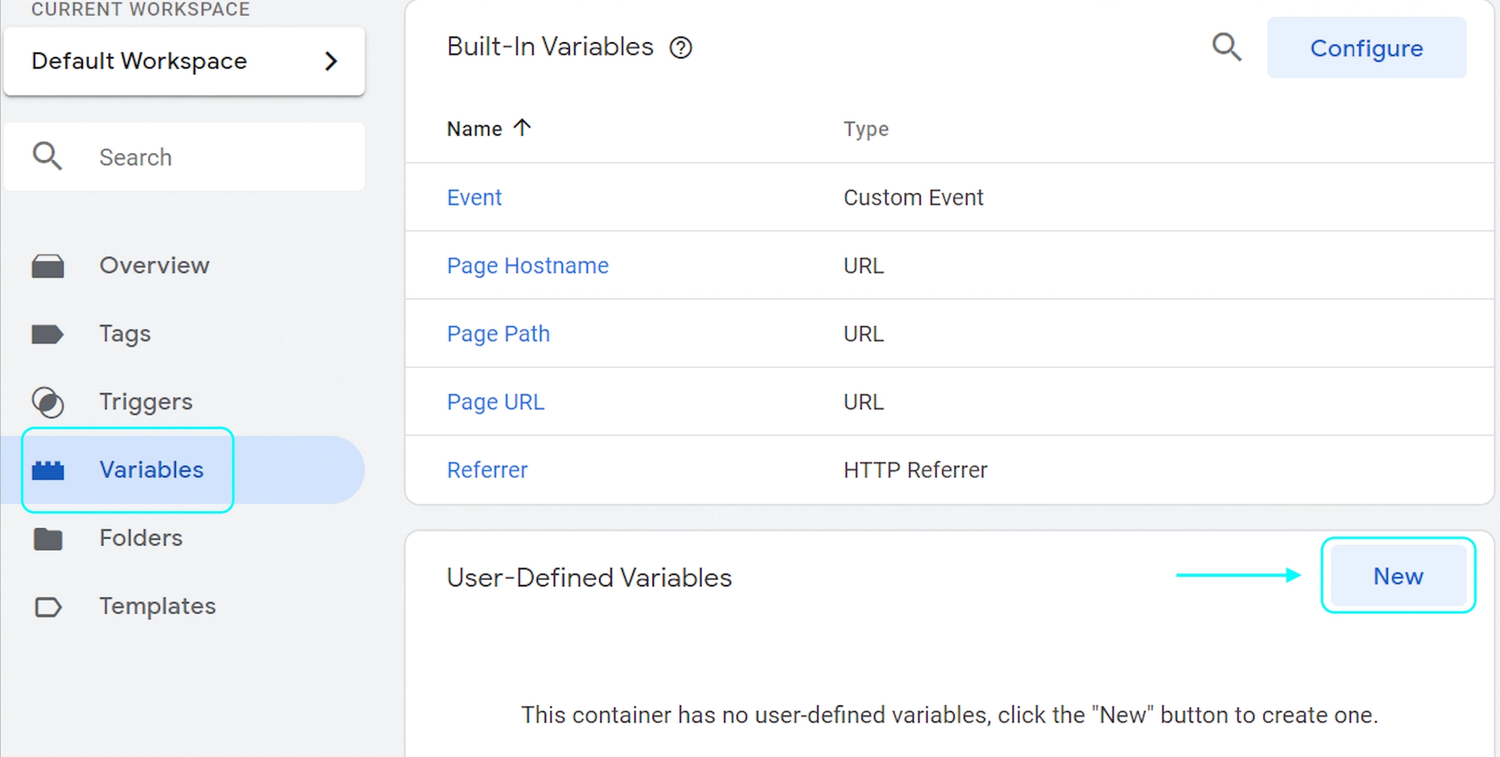
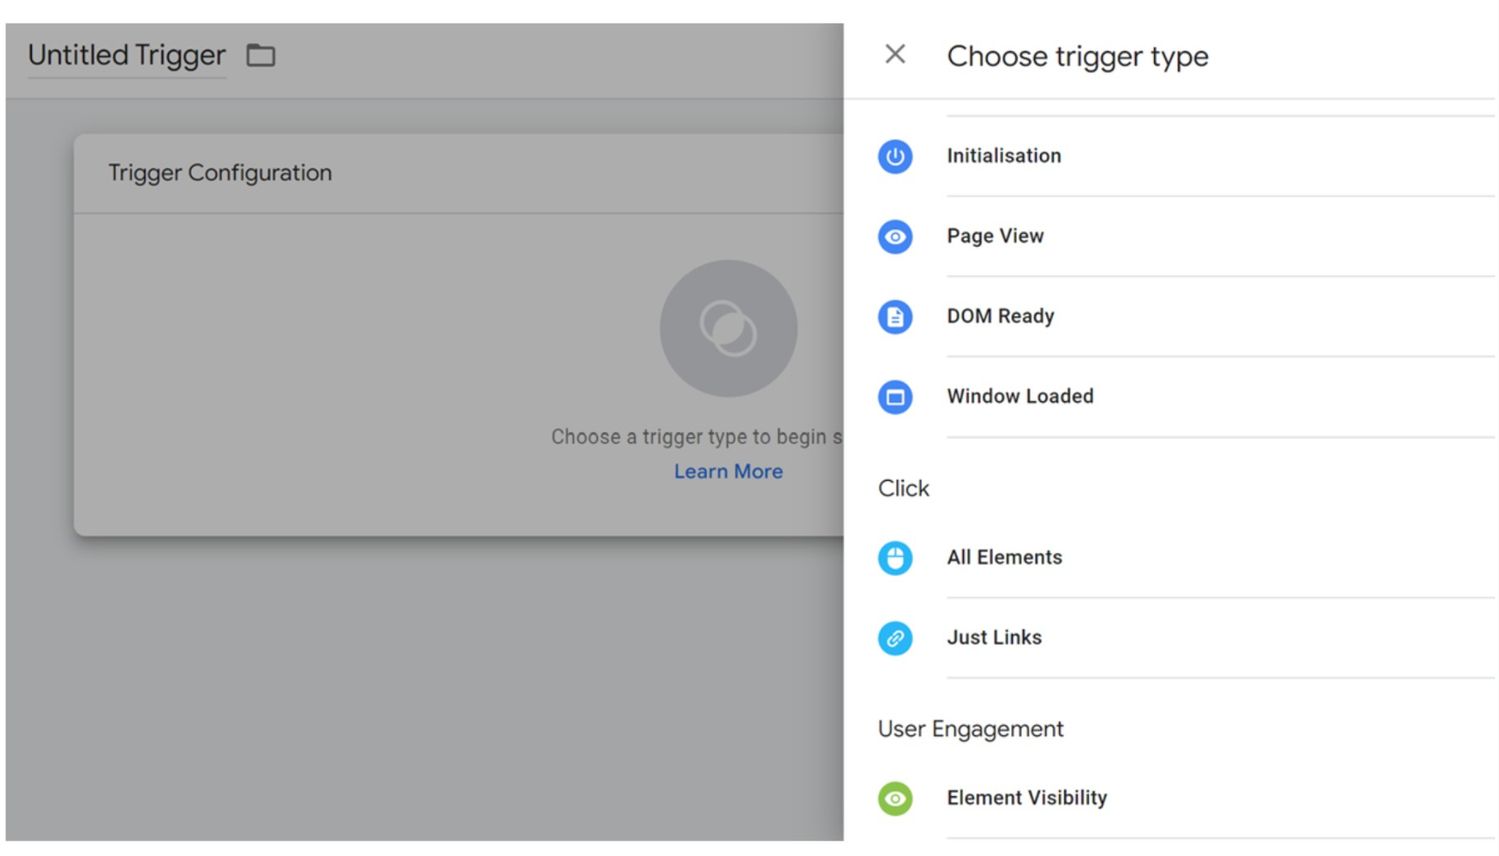
Step 1: Click “Variables” on your Google Tag Manager homepage
Step 2: Under “User-Defined Variables”, click “New”


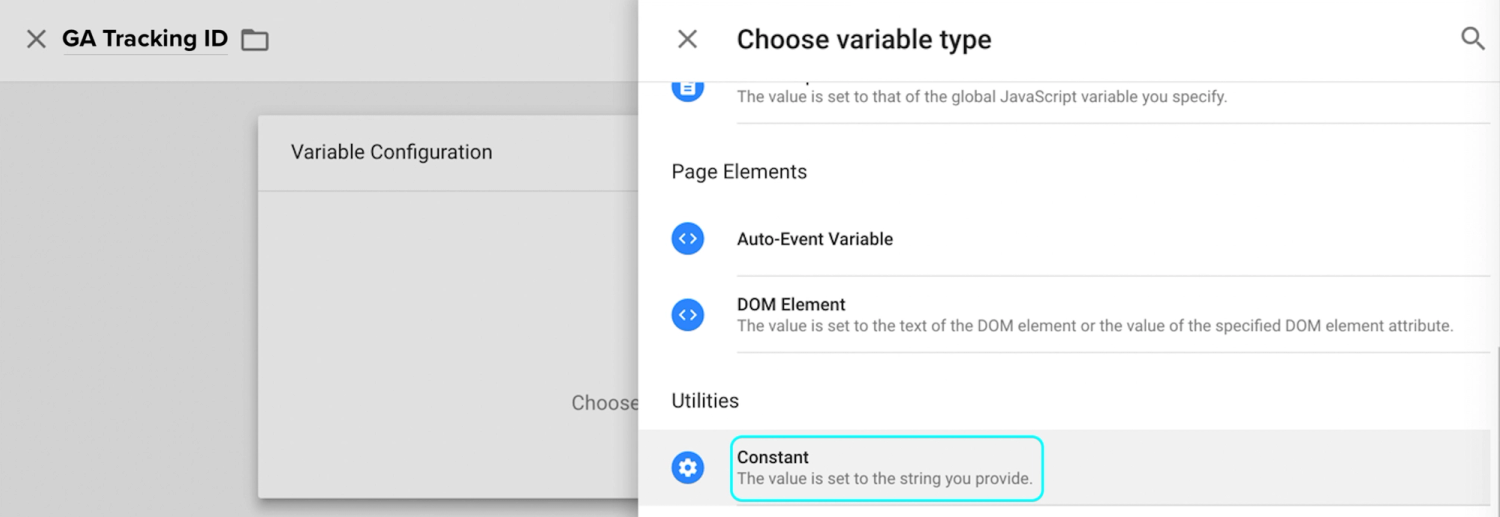
Step 3: Name your variable
For this tutorial, I've named mine “GA Tracking ID” so I’d remember. Once you've entered the name, click the “Variable Configuration” box.
Step 4: Pick a variable type
Choose “Constant” as your variable type since you don’t want the ID to change for different tags.


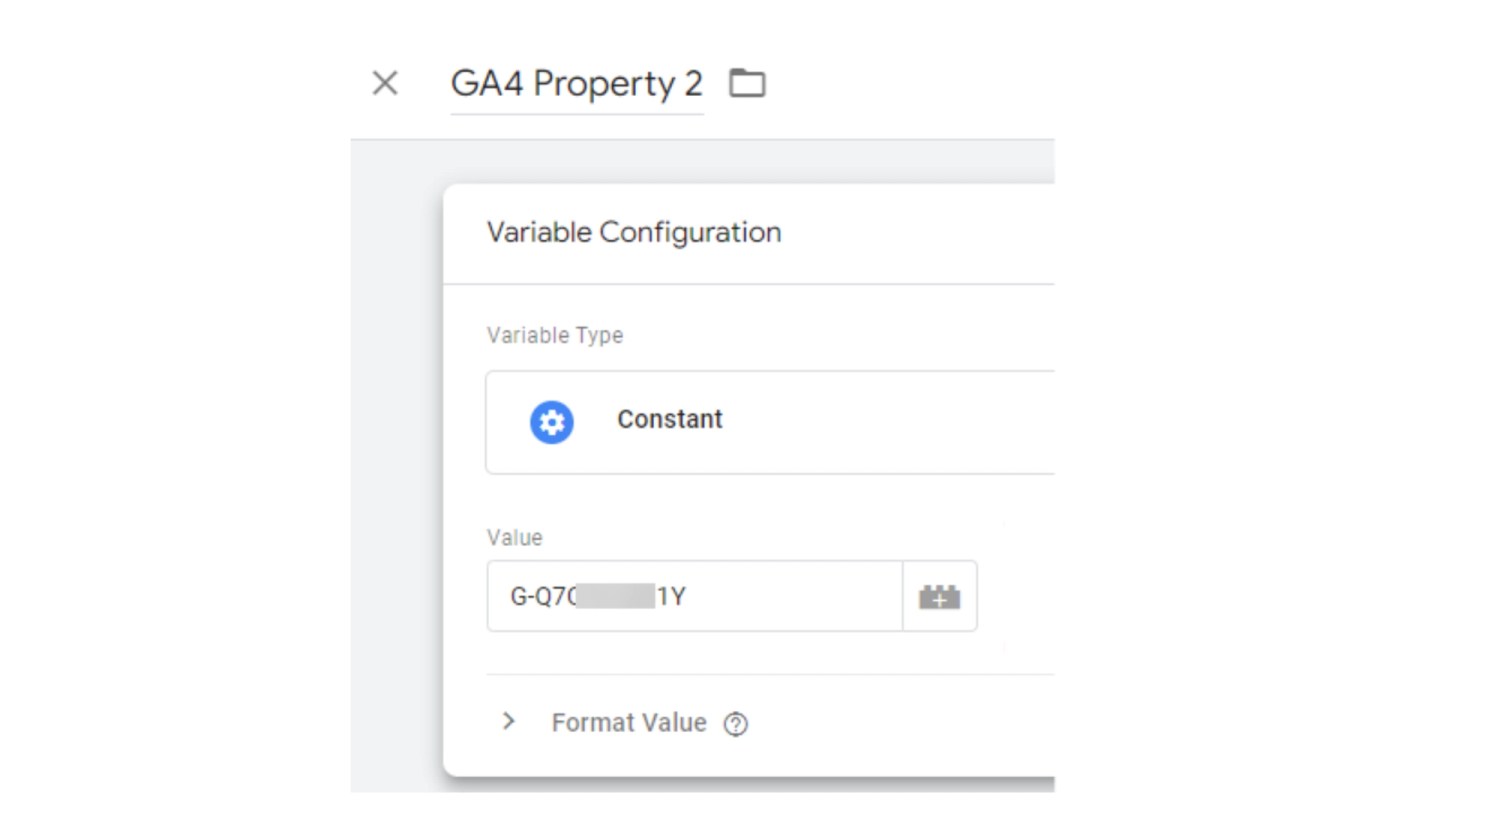
Step 5: Save your settings
Finally, input your Google Analytics Tracking ID number into the “Value” box and hit “Save” at the top right.


How to create a GA4 Event tag
You've just laid the groundwork by creating your variable and now it's time to bring your tracking to life by creating the Event tag itself.
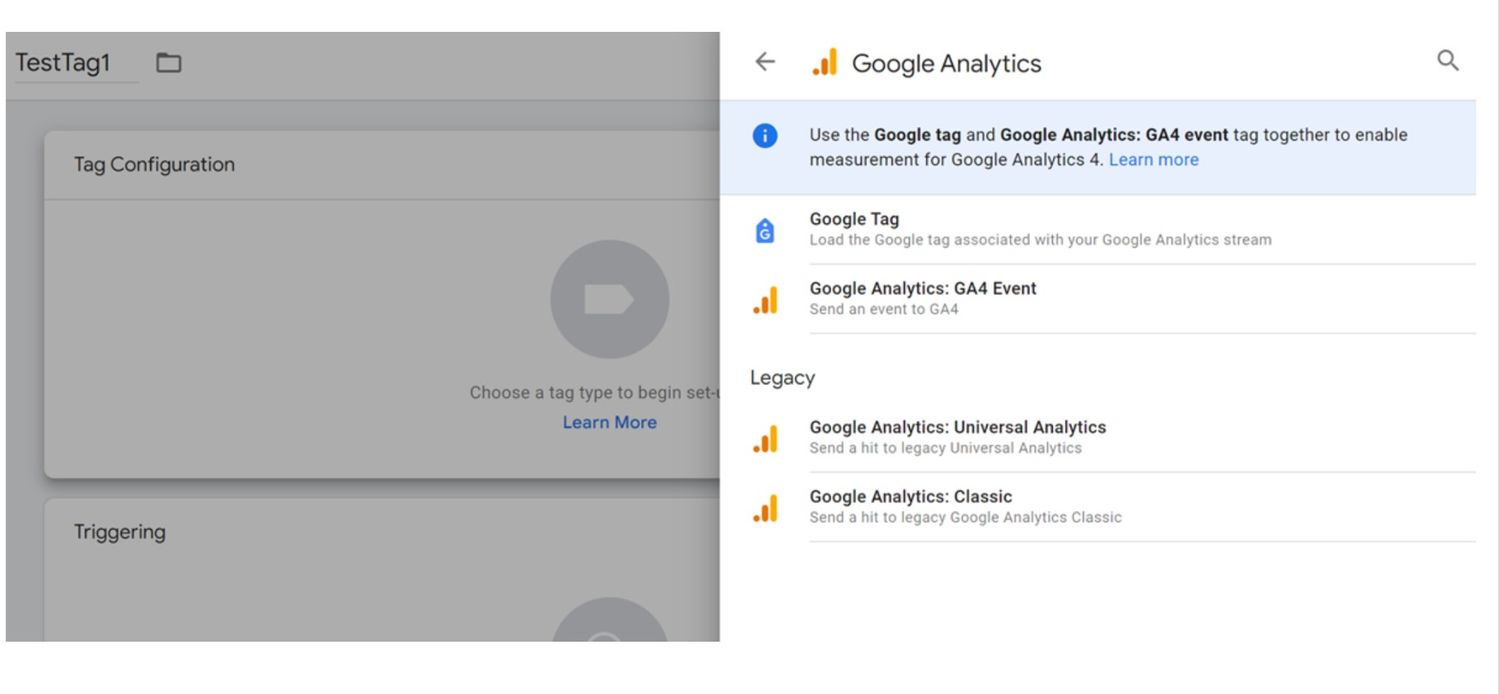
Step 1: Create a new tag
Click “New Tag” or “Add New Tag” and give your tag a descriptive name, like "GA4 Button Click Event".


Step 2: Choose your tag type
Select “Google Analytics: GA4 Event” as the tag type. It's good practice to use the latest version, so choose Google Tag (New).


Step 3: Configure the tag
If you already have a GA4 Configuration tag, select it. If not, enter your Measurement ID.
Name your event (e.g., button_click) to specify what action you're tracking.
Step 4: Add Event parameters (Optional)
Want more details? Add parameters like button_name: {{Click Text}} to pass the button's text as a parameter.
Step 5: Set the trigger
Under “Triggering”, select the trigger you created for button clicks to determine when the tag should fire.


Step 6: Save and test your tag
Save your tag, then click “Preview” in GTM. Go to your website and click the button to ensure the tag fires correctly. You should see the event in the GTM preview pane and later in the GA4 real-time report.
Step 7: Publish your changes
If everything looks good in Preview mode, go back to GTM and click “Submit” to publish your new tag and trigger configuration. Name the version, describe the changes, and click “Publish”.
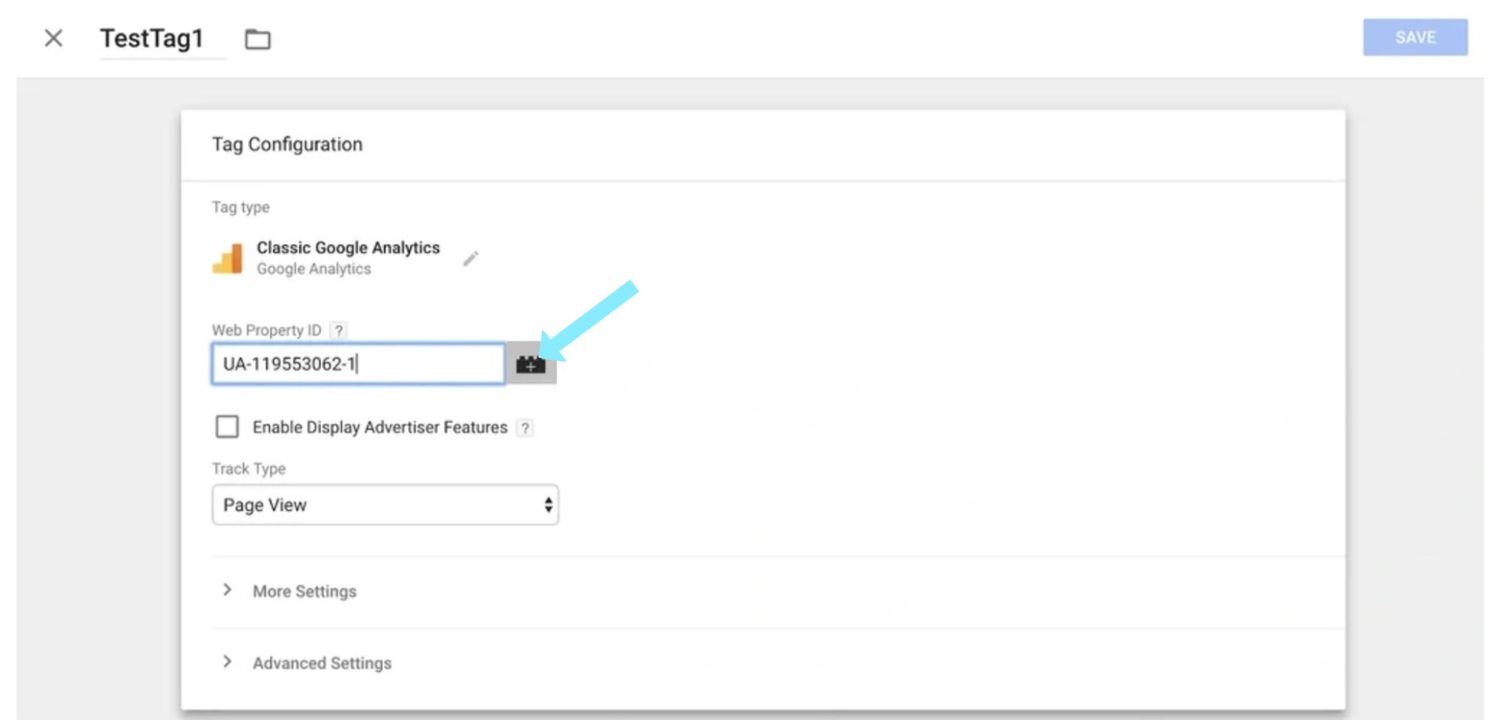
How to edit a tag and change its value
Finally, let’s bring everything together by editing the “TestTag1” you just created and including the new variable you made earlier in this post.
Step 1: Choose a tag to edit
From your GTM homepage, select “Tags” from the sidebar. Click on the tag you want to edit (in this case, “TestTag1”).


Step 2: Add the new variable
Click the grey “+” icon next to the “Web Property ID” box.


Step 3: Select your variable
A “Choose a variable” box will pop up. Select the first option, which will be the variable you created earlier, in this case, “GA Tracking ID.”


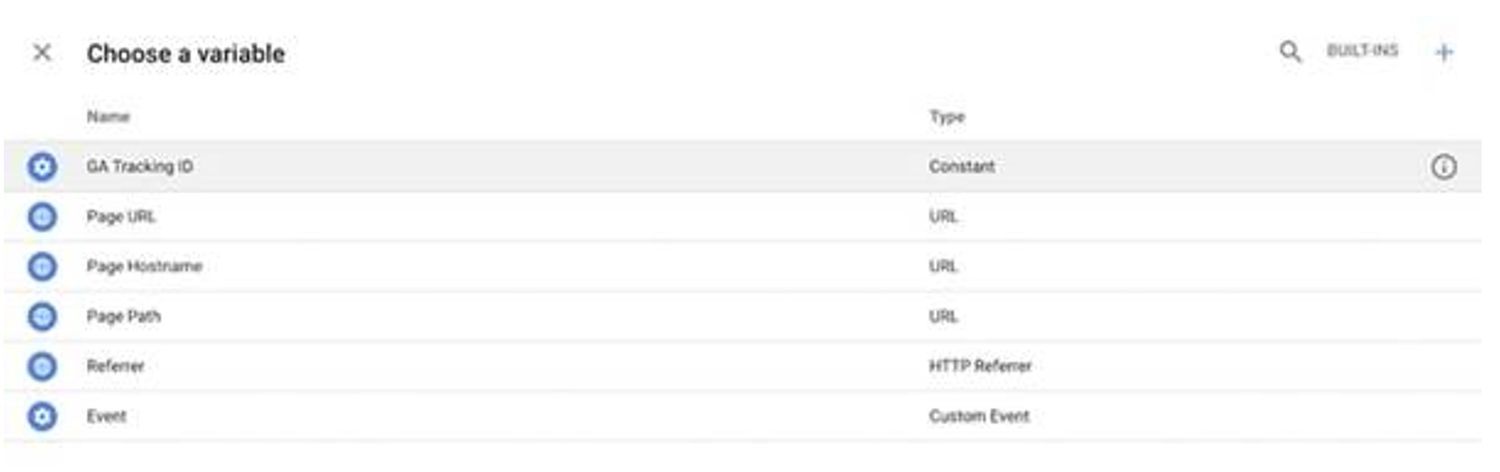
Step 4: Save your changes
Now, your tag’s “Web Property ID” should display the variable name you selected. Click save, and your tag is updated!


Congratulations
Well done! You've learned the basics of how to set up Google Tag Manager and empowered your website with powerful tracking capabilities. Whether you're monitoring clicks, form submissions, or engagement metrics, accurate data collection is now at your fingertips.
Conclusion
If you don't have the resources to wrap your head around GTM, leave it to us! At Indago Digital, analytics are our bread and butter and our experts are here to help ensure your data works harder for your business.
Book in a chat with our Chief Data Officer, Preet Singh today.

Written by
Adam Soetrisno